
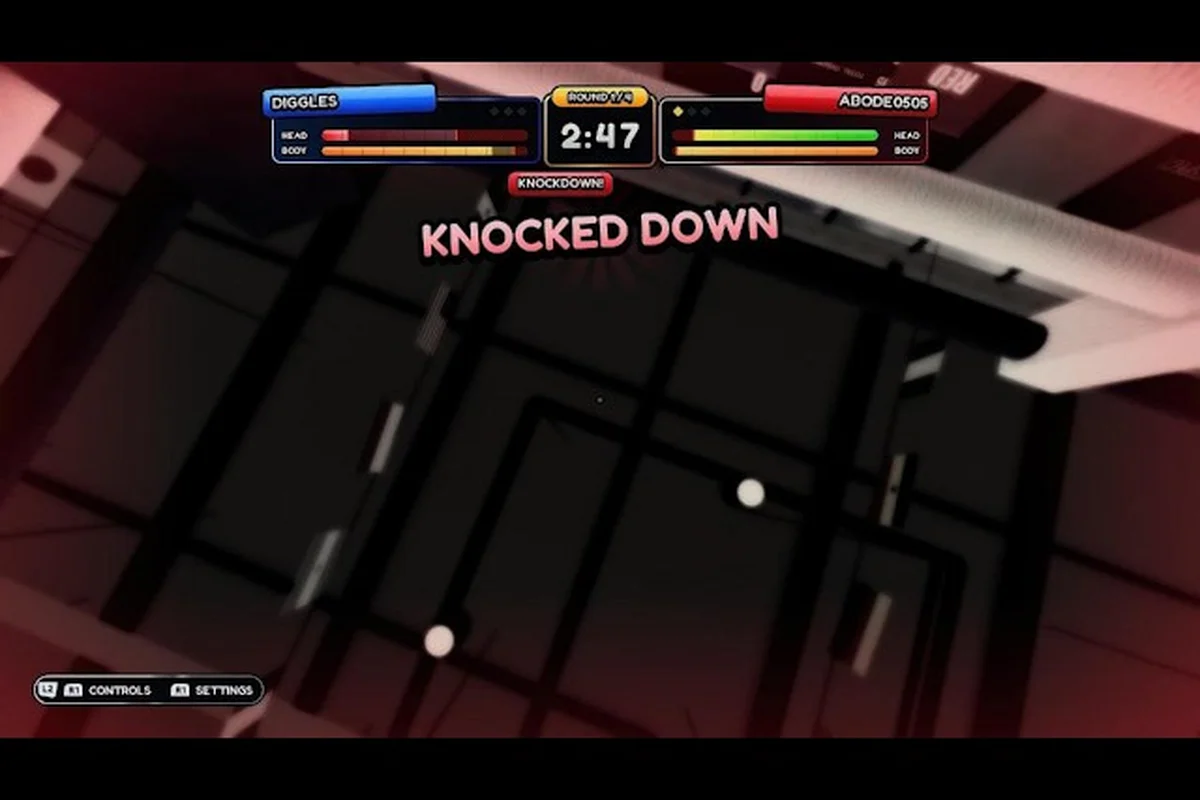
A clean first person view is the single biggest factor between reading your opponent's jab and eating it square in the face. The default first person boxing camera settings work for casual warm-ups, but the moment you start trading real combinations the camera lag starts costing you rounds. This guide walks through every visible camera-related knob — field of view, mouse sensitivity, head-tracking, and the supporting graphics toggles — so you can keep your rival framed in the center of the screen while your hands do the actual work.
Understanding the First Person Boxing Camera System
The camera in this game is a literal pair of eyes fixed to the boxer's head, not a detached spectator rig. That detail changes everything: when your fighter leans into a slip, the camera leans with them, and when a counter snaps your head back, the whole world tilts for a split second. Because the view is welded to the head, your sensitivity choices in the settings menu have a direct impact on whether you can track a weaving opponent or whether they keep slipping out of frame.
According to the official store page, the experience supports cross-play on PC, mobile, and console, but the camera settings described here are most relevant to mouse-and-keyboard players. Console players typically tune aim through in-game controller curves, while mobile players rely on the touchscreen stick; both groups still benefit from the FOV and head-tracking advice that follows.
The camera settings menu is split into four sub-panels in the current build. You will find a Field of View slider, a Mouse Sensitivity group with separate X and Y axes, a Head Tracking toggle, and a smaller Graphics cluster that influences how the camera renders motion. None of these sliders is locked behind a paywall — every camera option is available from your first match in practice mode against the AI.
What the Camera Actually Controls
| Setting | What It Adjusts | Where to Find It |
|---|---|---|
| Field of View (FOV) | Horizontal degrees of visible ring | Settings → Camera |
| Mouse Sensitivity X | Horizontal aim speed | Settings → Camera |
| Mouse Sensitivity Y | Vertical aim speed | Settings → Camera |
| Head Tracking | Whether the camera follows the opponent | Settings → Camera |
| Graphics Quality | Shadow, draw distance, and motion smoothing | Settings → Graphics |
It is worth noting that the official description does not list a free-look toggle, a third-person backup, or a replay camera in the basic settings. The publisher, Can You Box?, keeps the camera firmly first person, which means every adjustment you make has to be made through the in-head view.
Field of View: How Wide Is Wide Enough
Field of view is the angular width of the camera frustum, measured in degrees. A narrow FOV makes opponents look larger and helps you read subtle shoulder movement, but it also means a single sidestep can shove your rival completely out of frame. A wide FOV keeps more of the ring visible at the cost of making distant punches look smaller and easier to misjudge.
The first person boxing first person camera uses a horizontal FOV slider that, according to community testing on the latest patch, ranges roughly from 70° to 110°. The default sits near 80°, which favors a tighter, more cinematic view but punishes players who rely on peripheral awareness. Most players in the current ranked event, RANKED + BUG FIX!, reportedly run between 85° and 95° once they climb out of the placement rounds.
FOV Trade-Offs at a Glance
| FOV Range | Strength | Weakness | Best For |
|---|---|---|---|
| 70°–80° | Easier to read hand telegraphing | Opponents can slip out of frame | Counter-punchers who like to sit still |
| 85°–95° | Balanced tracking and reading | Slight distortion at the edges | Most players, especially in ranked |
| 100°–110° | Maximum peripheral vision | Distant punches look smaller and slower | Aggressive swarmers who circle constantly |
If you spend most of your matches circling to your opponent's weaker side, lean toward the higher end so the ring stays visible. If you plant your feet and look for openings, the lower end gives you cleaner hand reads at the cost of needing to physically re-aim whenever your rival takes a sharp angle.
Community data from active players suggests a useful baseline: start at 90°, play ten practice rounds against the AI at three different FOVs, and keep the one where you land the most clean counters. The AI behaves predictably, which makes it the cleanest way to isolate FOV from every other variable.
Mouse Sensitivity: Finding the Tracking Sweet Spot
Mouse sensitivity in this game is split into two independent axes, and the split is meaningful. The horizontal axis governs how fast you can swing the camera to track a circling opponent, while the vertical axis controls how quickly you can re-center after a high or low slip. Locking them at the same value is a common beginner mistake because the camera in a boxing sim rarely needs equal vertical and horizontal travel.
The first person boxing sensitivity settings menu exposes both sliders in a single panel, and each one accepts any decimal value within its range. The published range, according to players who have data-mined the current build, runs from 0.1 to roughly 10.0 per axis, with the default sitting at 4.0 for X and 3.5 for Y. There is no separate "ads sensitivity" or "scope sensitivity" in this game because there are no scoped weapons — every punch is fired from the same fixed-eye position.
Sensitivity Reference Table
| Playstyle | X Axis | Y Axis | Why It Works |
|---|---|---|---|
| Precision counter | 2.5 | 2.0 | Slow, deliberate tracking; tight counters |
| Balanced default | 4.0 | 3.5 | Mirrors the out-of-box config |
| Aggressive swarmer | 6.5 | 5.0 | Fast circling needs quick horizontal swing |
| Reactive dodger | 5.0 | 6.0 | Prioritizes vertical slip tracking |
The first person boxing mouse sensitivity slider is non-linear in practice: a jump from 2.0 to 4.0 feels like double the speed, but a jump from 8.0 to 10.0 feels much closer to a 25% bump. If you are already near the top of the slider, you will get more mileage out of a smaller mouse pad with a high DPI than you will from cranking the in-game slider any further.
One tip reported by experienced players: cap your in-game sensitivity, then raise your hardware DPI to reach your true comfort zone. Pushing the in-game slider past roughly 7.0 on either axis often introduces micro-stutter when the camera is supposed to be still, because the engine is constantly re-aiming at sub-pixel offsets. A clean hardware-side 800 DPI paired with an in-game value near 5.0 tends to feel smoother than a 1600 DPI with the slider pinned at 9.0.
Head Tracking and Camera Lock-On Behavior
Head tracking is a binary toggle in the current settings, but its effect is larger than the single checkbox suggests. When head tracking is on, the camera subtly yaws to keep the opponent's head near the center of the screen even when you are not moving the mouse. When it is off, the camera is anchored strictly to your fighter's head and follows only your mouse input.
The official description does not document the exact tracking curve, and the developer has not published the underlying values, so any number quoted here is from player observation rather than an official source. The community consensus is that head tracking adds roughly 10°–15° of passive yaw at the extreme angles, which is enough to keep a circling opponent on-screen without taking over the aim entirely.
Head Tracking On vs Off
| Scenario | Head Tracking On | Head Tracking Off |
|---|---|---|
| Opponent circles clockwise | Camera drifts with them, fewer re-aims | Must drag mouse constantly |
| You are planted, waiting to counter | Opponent stays roughly centered | Slight tracking jitter, cleaner reads |
| You throw a heavy combination | Camera locks onto your own head motion | Pure mouse control, easier to over-swing |
| You are getting knocked around | Camera fights the screen shake | Screen shake is unfiltered, more disorienting |
Players who primarily use a guard-and-counter approach tend to leave head tracking on, because passive framing is exactly what they need. Players who like to bait and then whip the camera onto a target mid-bait usually turn it off, because the passive drift can yank the view away from where they want to throw the next punch. The setting is also reported to be one of the more patch-sensitive values, so check the latest patch notes whenever an update lands.
Graphics Settings That Quietly Affect the Camera
The first person boxing graphics settings are not just about frames per second. Several of the toggles in the Graphics panel influence how the camera renders motion, which in turn affects how your eyes track incoming punches. If your camera looks smooth but your brain cannot read a jab, the bottleneck is often a graphics setting, not a sensitivity one.
Motion blur in particular interacts with the head-mounted camera. When motion blur is set to high, every slip and head-snap leaves a faint trail, which is cinematic but also makes it harder to pinpoint exactly where the opponent's hands are mid-exchange. The same is true for depth-of-field: the game does not expose a strong DoF slider, but the high-quality preset adds a subtle blur at the edge of the screen that can hide a circling opponent's lead hand.
Graphics Settings and Their Camera Impact
| Setting | Effect on Camera | Recommendation |
|---|---|---|
| Motion Blur | Smears fast head movement | Off or low for ranked play |
| Shadow Quality | Adds detail to opponent's footwork | Medium; ultra rarely matters |
| Draw Distance | Keeps the far ropes visible | Medium is enough for a 16-player ring |
| Anti-Aliasing | Smooths ring ropes and gloves | Low or medium to keep input lag minimal |
| Screen Shake Intensity | Amplifies camera shake on hits | Reduce if you get motion sick |
Screen shake deserves its own callout. The publisher lists cinematic knockdowns and replays as headline features, and both of those lean heavily on screen shake. During a normal exchange, however, heavy shake can knock your crosshair off-target for a full half-second after a clean hit lands. Dropping the screen shake intensity is one of the cheapest upgrades you can make to your camera feel.
The first person boxing settings guide approach that most veterans describe is to drop every cosmetic graphics setting to medium or low, then put the saved frames into a stable frame rate. A locked 60 FPS feels much better to the camera than an uncapped 90 FPS that dips to 45 every time a knockdown plays out. If you want a smoother reference, the controls breakdown for keyboard versus controller covers how frame pacing affects input feel on each input method.
Tuning Camera Settings for Ranked Matches
Ranked play, including the current RANKED + BUG FIX! event, compresses the camera tuning problem. The official event page confirms the mode exists, but no further details about ranking tiers, placement rules, or rating formulas are published. Because the underlying numbers are not public, the safest approach is to assume your camera has to be competition-ready from round one rather than gradually tightened across placements.
The first person boxing settings guide approach for ranked play boils down to four priorities. First, lock your frame rate so the camera never stutters mid-combo. Second, pick a single FOV and never change it during a session. Third, calibrate your X and Y sensitivity together so a clean horizontal flick also produces a clean vertical reset. Fourth, decide once whether head tracking helps or hurts your style and stop toggling it between rounds.
Ranked Camera Checklist
| Step | Action | Why |
|---|---|---|
| 1 | Cap FPS to a stable multiple of your monitor refresh | Stops the camera from stuttering on frame dips |
| 2 | Set FOV to your tested baseline (usually 85°–95°) | Avoids mid-session drift |
| 3 | Match X and Y sensitivity to your verified numbers | Prevents uneven tracking |
| 4 | Pick a head tracking state and stick to it | Reduces split-second hesitation |
| 5 | Turn motion blur and screen shake down | Keeps incoming punches readable |
| 6 | Play three full matches in this config | Locks muscle memory before climbing |
A useful drill is to spend fifteen minutes in the free practice mode against the AI before queuing ranked. Throw the same ten-punch combination at three different FOVs and three different sensitivity pairs, and keep the combo of settings that lets you land the most clean hits. The AI is predictable enough that any setting weakness will show up within a single session, which is faster than discovering the weakness in a ranked loss.
If you find your camera feels off mid-session, the first person boxing mouse sensitivity slider can drift in your muscle memory faster than you think. After roughly an hour of play, sensitivity choices start to feel either too slow or too fast simply because your hand has warmed up. A quick reset to the values you tested in practice mode brings the camera back to a known good state. The same principle applies when switching between match settings in different game modes, since the camera feel is identical across modes but your pacing usually changes.
Frequently Asked Questions
What FOV should I use in First Person Boxing?
Most players settle between 85° and 95° once they leave placement rounds. Start at 90°, run ten practice rounds against the AI, and keep the FOV that produces the most clean counters. The exact best value is personal, because the official description does not publish a recommended FOV.
Should head tracking be on or off?
Head tracking helps guard-and-counter players because it passively keeps the opponent framed, but it can pull the camera off-target during baits. Aggressive players who like to whip the view manually usually prefer it off. The toggle is the single most patch-sensitive camera setting, so recheck it after every update.
Is the default mouse sensitivity good enough?
The default 4.0 X and 3.5 Y works for casual play, but most ranked players raise the X axis to roughly 5.0–6.5 and lower the Y axis to roughly 2.0–3.0. The split is intentional, because horizontal tracking is more important than vertical tracking in a boxing sim with no jumping or ducking.
Do graphics settings actually change how the camera feels?
Yes. Motion blur smears fast head movement, screen shake amplifies after every clean hit, and low frame rates cause the camera to stutter. Dropping motion blur and screen shake, and locking a stable frame rate, will make the camera feel tighter even if you do not touch a single sensitivity slider.
Where do I find the camera settings in the menu?
The camera settings live under the main Settings menu, in a sub-panel labeled Camera. Field of view, mouse sensitivity X and Y, and the head tracking toggle are all on the same screen. Graphics toggles that affect the camera are in a separate sub-panel labeled Graphics, which is where you will find motion blur, shadow quality, and screen shake.